
Shopify is one of the most popular and powerful ecommerce shopping cart and ecommerce solutions, and it can integrate with one of the most influential website data tools available to online businesses: Google Tag Manager. You’ve likely heard of both and seen some people struggle to combine the two and create a powerhouse ecommerce platform.
If so, you’ve struck gold. We’re going to look at some of the benefits of Google’s Tag Manager and how it can give you data to improve your Shopify store, while also walking you through a few simple steps to integrate the two services.
Give your digital store the boost it needs by linking these two useful platforms, with no real coding knowledge required.

Tested with Google tag assistant and works for any Shopify store plan. Shopify GTM datalayer set up, google tag manager shopify purchase event, up to 5 scripts added as standard and enhanced e-commerce tracking.
Google Tag Manager (GTM) is a complementary tool that you can use alongside Google Analytics to better manage your Shopify store.
Essentially, GTM is a simple and direct interface that lets you manage the tags on your website. These tags can help you understand your audience and site performance, such as conversion tracking, remarketing, Google Analytics results, and much more.
The important thing to take away is that GTM makes it simple to add tags to your site. A tag is a little snippet of JavaScript that tells GTM what to do, such as send information to services, track activities, or add another tally to a list.
GTM also makes it easy for you to determine how tags will be applied. It takes away the need to dive into your website code to determine when you add a tag to a visitor or an event. Instead, you get a simple dashboard that is in plain language.
The system operates by creating tags and triggers, which are events that must occur for a tag to be applied. Tags and triggers can range from complex to simple and will help you determine information about your website. For example, if you have a new report, you can set up a tag to track downloads of this report with a “Click Trigger” on your website. You can further refine this with other triggers that might separate out these clicks based on where the site visitor first came from, such as a tweet, Facebook post, or search.

Now that you’ve got an understanding of what Google Tag Manager is, it’s time to talk about why this matters to your business. Here are a few of our ways to use GTM as well as some reasons to justify the effort.
We’re big fans of Google Tag Manager because it allows you to enhance and improve your business operations. Check out some of our favorite reasons for using GTM or another tag manager:
And so, so many more. It is an incredibly powerful tool, and you’ve got a lot of freedom to play safely and find the hidden information that can take you to the next level. It helps you unleash the potential of Shopify and identify the best opportunities for efforts like jumpstarting a business through selling wholesale on Shopify.
Here are four big reasons we think you should consider Google Tag Manager:

There are three main things you’ll need to set up Google Tag Manager and integrate it with your Shopify account. Here they are:
Those are the big three things you’ll need, and thankfully they’re easy to gather.

There are a couple of things to keep in mind as you start to integrate GTM with your Shopify account. It can get a little wonky, so take a moment and read these couple items a few times. Everything should make perfect sense as you walk through these steps, but just in case, check back in up here as you go.
So, the caveats:

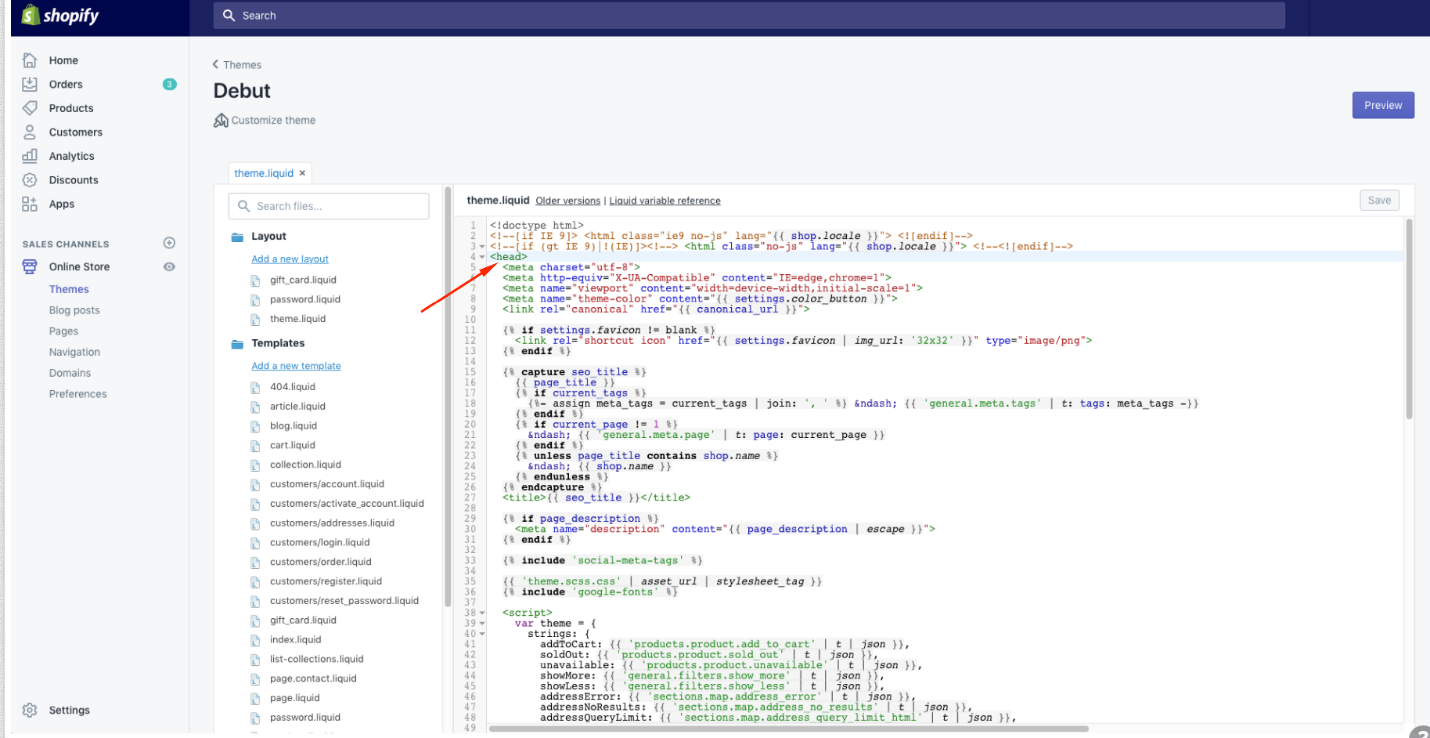
Now that you’ve got your three sets of login information, you’re ready to get started adding GTM to your Shopify store. Remember, we’re looking for Google Tag Manager code snippets, and you’re just adding them to the theme.liquid and checkout.liquid files.
Choose the section below that fits your status: you’re either a first-time Google Tag Manager user or you’ve already set up an account.
If this is the first time you’re using GTM, it’ll show your snippet as soon as you create your first Web container. Here’s how to get there:
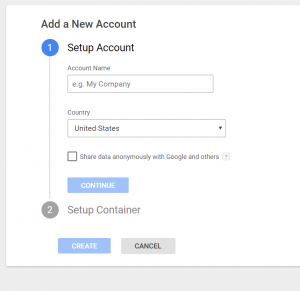
Add in the name of your company, select your country, and then choose if you want to share data or not.

Use your site URL for the container name and then select the Web option.
After you hit create, you’ll get to see your snippets. It should look similar to the image below.
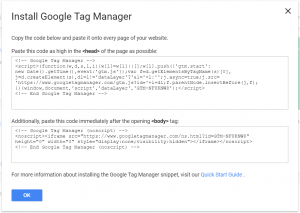
Your snippet will look something like this.
Now, hit the pause button on your online activity! You’ve got your snippets, and now it’s time to jump to our “Shopify Admin Steps” subhead below.
If you’ve already used Google Tag Manager, then you won’t get directed instantly to your snippet. However, it’s just a click away. Look at the right-hand part of your screen and click on “Install Google Tag Manager.”
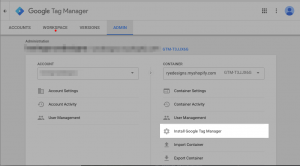
Image courtesy of Shopify’s superstar Help team.
That button will take you directly to your snippet so that you’re ready for the next step.
In a new tab or a new browser window, head over to Shopify and log in with your admin credentials. Follow these steps to add both bits of code.
Here’s what this page looks like when we first navigate to it in our test store.
Take a breath; you’re doing great. Next, we’ll be doing something very similar, just with the <body> snippet.
Congratulations, you made it through the tricky part. Now, head on over to the Google Tag Manager page and finish any additional steps you need or add in any other tags or elements you’d like. The Google page will walk you through all of this.
There’s one important note that comes directly from Shopify. When you are prompted to add tags, there are three tags you should not add:
Fire up the Preview Mode option in Google Tag Manager, and you’ll be able to make sure that GTM installed properly. If you want direct control on the computer you’re using, there are also some browser extensions available, including one named the Google Tag Assistant.
And, now you’re ready to rock. You know the benefits of adding Google Task Manager and now the process for doing it too. Good luck and happy sales.
Author: Jake Rheude
Jake Rheude is the Director of Marketing at Red Stag Fulfillment, an ecommerce fulfillment warehouse that was born out of ecommerce. He has years of experience in ecommerce and business development. In his free time, Jake enjoys reading about business and sharing his own experience with others.
Tested with Google tag assistant and works for any Shopify store plan. Shopify GTM datalayer set up, google tag manager shopify purchase event, up to 5 scripts added as standard and enhanced e-commerce tracking.
Giles Thomas
CEOOptimize your Shopify conversion rates. 5 lesson course, learn 51 ecommerce best practices to get more visitors to buy.